Showing posts with label 3D Printing. Show all posts

Wearable Art: 3D Printing + Embroidery


When I first started working on my own 3D printing projects, I kept coming back to the idea of combining 3D printing with embroidery.  I have always loved handwork as well as the combination of traditional handcrafts with modern technology.  In that vein, I have begun developing my own jewelry pieces that incorporate embroidery, but it would also make for a great art lesson to teach beginning students about 3D printing and design.

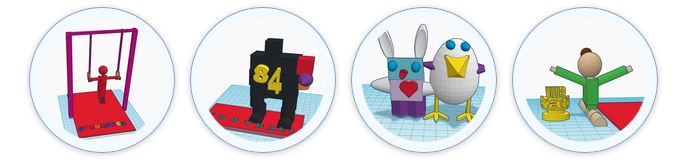
This project can be designed quite simply in TinkerCad.


If your students have never used TinkerCad before, you will want to start by giving them a tour of the program and demonstrating how to combine shapes as well as how to use the hole feature to cut holes in their design.  Cutting holes will be necessary to later embroider the printed design.


I also use this time to show students examples of embroidery in art.  Here are some great examples to inspire them:


We also talk about wearable art and considerations when designing a piece of art that is made to be worn.  Once students have been introduced to the project, I give them time to sketch out their ideas.  If you have enough time, it would be a great idea to hold an idea critique at this time, so they can present their ideas to their classmates for feedback before jumping into the design process.

Once students have their ideas and sketches, you can let them loose in TinkerCad to begin their designs. Students will need to think about scale of their overall designs as well as the size and placement of the holes.  

Once they are finished, the models can be printed, and then students can begin work on embroidering their designs.  If you have never done handwork in your classroom, it may be helpful to give students a quick tutorial on embroidery.  You may also want to provide students with some basic jewelry findings so they can finish off their designs and turn them into wearable jewelry.


You can take this project in so many directions!   The finished pieces can be displayed in a student art show, modeled in a fashion show, or even sold at a school event as a fundraiser.  This could also be combined with a marketing or entrepreneurship class, giving students the added challenge of pricing and marketing the designs.


Handouts for Robot Lesson

When I teach the 3D Printing robots lesson to elementary age students, I start with a discussion about geometric shapes and provide them with a booklet that guides them through the unit.  The start by identifying common shapes and we talk about the difference between 2D and 3D.  They then begin to envision how they would construct their robot using geometric shapes.  We spend a lot of time looking at related works of art and talking about creative ways to use the shapes.  We also look at some animation for ideas and inspiration.


Finally, when students have finished designing their robots, they are invited to write an imaginative story about their robot creation.


If you are interested in doing a similar project with your students, I am sharing my file for the booklet:  click here to download.

Teaching 3D Modeling -- Software options


Student project designed in TinkerCad

Before I get started talking about the different projects I have designed for my Art classes, I wanted to talk a little bit about the programs I use, and go over how to select a program to teach 3D Modeling.  If you've never done 3D modeling before, it can be a little daunting, so I would recommend taking a course or at least playing around with it yourself before jumping in.  I think a lot teachers are hesitant to teach 3D modeling because it might not be something they ever learned, but with a little practice, you can learn enough to get your students started.


Made by the AutoDesk famiy of software, TinkerCad is an awesome place to get started with 3D modeling.  It's web-based and free, so it fits easily within any budget.  It's simple enough to be used by elementary age students, but offers enough variety and advanced features that it won't bore your more technically advanced students.


I'm hoping to put together some video tutorials and/or a downloadable guide book on how to get started teaching TinkerCad.  If this is something you would like to see, please let me know.

For elementary students, I've used the basic geometric shapes that are built into TinkerCad as the basis for the Geometry Robots unit.

Sculptris is the program I've used with my intermediate students.  So far, I've stuck with TinkerCad for elementary and middle grades, and only taught Sculptris to my high school students.  It's a great a program, but a bit buggy at times, so it demands a good deal of patience.  However, it's a great program for being able to sculpt in 3D.


This program was used with good success with my Art History students in the Mini Museum project.

Last, Blender is the program that I used with my advanced 3D Modeling students. It's another open-source program and it's really wonderful.  I start out the semester showing my students a demo reel of professional models and animations made with Blender so that they are aware that they are using a professional-level software.  It's fantastic, but definitely a lot more difficult than TinkerCad.  If you are new to teaching 3D modeling, you probably don't want to start with Blender, but there are a lot of tutorials and courses you can take if you want to learn it.  For students that have the skill set and maturity to learn Blender, it offers them a great deal more control over their final creations.

Some of my students used Blender for the jewelry design project and the Art History Mini Museum with great success. 

Those are just a few of a whole host of programs out there for 3D modeling.  What software do you use to teach 3D modeling?


3D Printing in the Art Room

I was lucky enough to win a 3D printing competition, sponsored by MakerBot and Thingiverse, for my school.  This was a huge deal, because one of my goals for our arts program was to get a 3D printer, but it was not within the school's budget.  Over the next few posts, I am going to share with you the various ways that I have been able to incorporate 3D printing into our Art program.

Our MakerBot in action
3D printing is an amazing technology, and it teaches so much to the students!  It teaches them to be thinkers and designers, and there is a great deal of problem-solving and revision that goes into play.  I know some schools use 3D printers are part of their technology department, but I think that it is a fantastic tool to be used in the art room as part of an integrated arts curriculum.   Over the next few posts, I will show the different projects I designed, specifically:

  • --Geometry Robots with TinkerCad (K-5)
  • --Figurine Design with TinkerCad (6-8)
  • --Jewelry Design with TinkerCad (9-12)
  • --3D Modeling with Blender (9-12)
  • --3D Printing "Mini Museum" for Art History (9-12)
Student projects on display at the Georgia Educational Technology Conference
I will continue to update the blog with student projects as we complete them.  Feel free to contact me with questions!  I would also love to hear how you incorporate 3D printing into your arts curriculum.


3D Modeling with 5th Graders: Geometry Robots


I worked with teachers at a local elementary school to help implement 3D printing into their Art curriculum.  We worked with four 5th grade classes on this "Geometry Robots" project.  The Art teacher introduced the project in Art class and students sketched plans for constructing a robot out of geometric shapes.  Students were tasked to think about the logistics of construction in 3D.

I then visited the students in their Technology class and taught them how to use the program TinkerCad.  Using their sketches as a guide, they build their robots from geometric shapes and other components.  Students learned how to move, rotate, resize, and combine their shapes.  They were encouraged to use the shapes creatively in their designs.  Students worked on these projects over two class periods in the computer lab.

Once student projects were complete, I worked with the teachers to show them how to print the files on their 3D printer.  However, this project could easily be implement in a school that does not have a 3D printer by simply skipping this step. The teacher can even take screen shots of all the students designs and print them as photos for display in the school.

For the culmination of this project, the Art teacher worked with the students to construct recycled material sculptures based on their robots.  Students can compare and contrast the initial sketch, 3D print, and sculpture.


...