Virtual Teaching -- Office Tour Part 1

In a few weeks, I will be returning to work, and many of you will be as well.  As many schools make the decision to teach virtually, at least for a short time, you may be starting to think about how you can set up your workspace to maximize your teaching efficiency and personal comfort.  Over the next few days, I will be sharing my workspace set-up that I have established over 8 years of teaching virtually and many tweaks and improvements.

Part 1 -- My desk

The desk is where you will do the majority of your work, so take your time thinking about how you want to set it up and what you want to include on it.  You also want to think about where you place your desk, because you will be sitting (or standing) at it for a large portion of the day.  If you have young kids at home with you, or other household distractions, choosing a space with a closing door can be a huge advantage.  

Currently, I don't have the advantage of a room with a door, but otherwise I'm very happy with my office set-up.  I started out in a corner of our bedroom, which was great for the door, but less great for the minimal space and lack of distance between work time and relax time.  I ended up deciding to move my office into our dining room, which we rarely used, and it has worked really well for me.  As you will see over the next few posts, my working office has more in it than you will likely need if your teaching from home is temporary, but if you are in it for the long haul, you will need to determine how much space you need and what types of resources you need to keep nearby.  

The best thing about my current set-up is that our dining room-turned-office has large bay windows.  Natural lighting has a very positive impact on my mood and helps keep my stress levels low, so having windows that I can look out (and in when the weather is nice, open!) is amazing.  I've adjusted the placement of my desk over the years, and have finally landed on having it placed so the window is to my left. I can look out it whenever I want, and it puts a lot of natural light on my desk area without washing out my webcam when it's on.  


The desk itself is from Ikea.  I have the Hilver tabletop paired with Olov legs.  This works well for me because it gives me a good bit of space, and also gives me the option to have either a seated or standing desk.  Currently, I'm using a seated desk due to some back issues, but I hope to convert it back to standing one of these days!


The best thing about this desk is that it's large enough for three monitors.  And while you may not think you need three monitors, trust me, you do!  Working with multiple monitors is a game-changer in terms of organization and productivity.

The computer on the left is my work-supplied laptop, which I have resting on a laptop riser (Brada from Ikea).  In the center is my main and largest monitor, and I also have an external mouse and keyboard so that I do not have to use the one on the laptop.  The screen to the right is slightly smaller and is currently raised up with the book America's Glorious Quilts. (I should probably get a second riser at some point, but I like to use what I have.)  

On a typical work day, I will have my Google Calendar, my work G-mail, and Google Hangouts on my left screen. This makes it easy to keep in touch with my co-workers and to keep an eye on what I have scheduled for my day.  The center monitor is where I am doing my "main" work and the one on the right is my secondary monitor.  For example, if I am entering student grades, I can pull their project up on the screen on my right and have the gradebook or rubric on the main screen.  This saves so much time vs. having to switch between tabs or windows.  

If you are currently working with one monitor, I recommend adding a second to see if it helps your productivity, and then you can always add a third once you are comfortable working between two.  


Here's a closer look at my center and right monitors.  I have a simple desk organizer placed in front of the right monitor where I keep my glasses, cell phone, and a few pens.  I also always have a glass of water on the desk, and photos of my kids.  I am also to keep the desk fairly clear and pared-down due to shelving that is placed behind me.  In the next post, I will share with you what I keep there, how I have it organized, and what my students and co-workers see when I am on camera.  


Wearable Art: 3D Printing + Embroidery


When I first started working on my own 3D printing projects, I kept coming back to the idea of combining 3D printing with embroidery.  I have always loved handwork as well as the combination of traditional handcrafts with modern technology.  In that vein, I have begun developing my own jewelry pieces that incorporate embroidery, but it would also make for a great art lesson to teach beginning students about 3D printing and design.

This project can be designed quite simply in TinkerCad.


If your students have never used TinkerCad before, you will want to start by giving them a tour of the program and demonstrating how to combine shapes as well as how to use the hole feature to cut holes in their design.  Cutting holes will be necessary to later embroider the printed design.


I also use this time to show students examples of embroidery in art.  Here are some great examples to inspire them:


We also talk about wearable art and considerations when designing a piece of art that is made to be worn.  Once students have been introduced to the project, I give them time to sketch out their ideas.  If you have enough time, it would be a great idea to hold an idea critique at this time, so they can present their ideas to their classmates for feedback before jumping into the design process.

Once students have their ideas and sketches, you can let them loose in TinkerCad to begin their designs. Students will need to think about scale of their overall designs as well as the size and placement of the holes.  

Once they are finished, the models can be printed, and then students can begin work on embroidering their designs.  If you have never done handwork in your classroom, it may be helpful to give students a quick tutorial on embroidery.  You may also want to provide students with some basic jewelry findings so they can finish off their designs and turn them into wearable jewelry.


You can take this project in so many directions!   The finished pieces can be displayed in a student art show, modeled in a fashion show, or even sold at a school event as a fundraiser.  This could also be combined with a marketing or entrepreneurship class, giving students the added challenge of pricing and marketing the designs.


Nick Cave's Sound Suits

While traveling in Savannah, I decided to check out the Jepson Art Museum, and I was so exited to discover that they were having an exhibition of Nick Cave's Sound Suits. I have log been a fan of Cave's art, but had never had the experience of seeing them in person.  It was amazing!  Each piece was beautiful and intricate and detailed and fascinating.  Here are some images I shot from the museum:


If you are not familiar with Cave's art, a great starting point is this video from Art21.  He is a fascinating artist and one that I love to show my students anytime we are discussing wearable art, performance, and/or fiber arts.


Here is another great interview with Mr. Cave:


However, if you get the chance to see the work in person, I highly recommend it!


Hashtaggin' It in Art History

In my Art History classes, I like to vary up the way we talk about art.  Sometimes our art discussions are long and detailed, like the time we spent the entire period discussing the ins and outs of Jan van Eyck's Arnolfini Portrait (one of my favorite works of Art, and always an interesting discussion!)  But other times I like to rapid fire responses, to get their initial response to an artwork.  So last week we played what I called "The Hashtag Game."  I would show an artwork, and then all at once, students were to reply with a hash tag.  I encouraged them to use the first thing that came to mind.  High school students can get self-conscious, so I reminded them that there were no wrong answers.  It wasn't about being right, it was about exercising their art response mussels. (Since I teach in a virtual school, the students responded by entering their hash tag in a chat pod.  In a brick & mortar classroom, this lesson can be done by writing on slips of paper, on the white board, or even using a tablet.)

These are the artworks I showed the class:

Yard Eggs, Sally Mann, 1991
Source:  Immediate Family by Sally Mann (Amazon)  or Christies (here)

Instillation by Margart Kilgallen
Source:  Here and there is also a great video on her at Art21

Detail of Cell (You Better Grow Up) by Louise Bourgeois, 1993
Source:  Louise Bourgeois by Robert Storr and image here

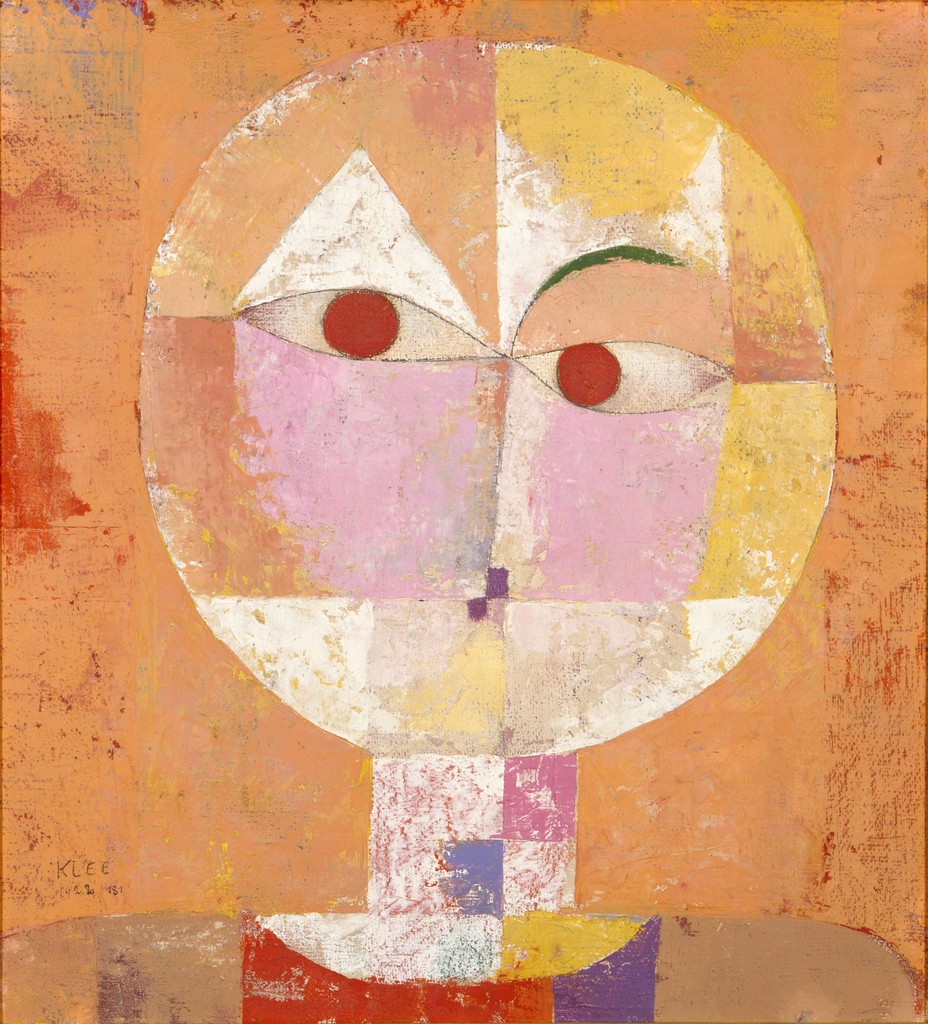
Castle and Sun by Paul Klee, 1928 (here)

What hash tag would you give them?

Handouts for Robot Lesson

When I teach the 3D Printing robots lesson to elementary age students, I start with a discussion about geometric shapes and provide them with a booklet that guides them through the unit.  The start by identifying common shapes and we talk about the difference between 2D and 3D.  They then begin to envision how they would construct their robot using geometric shapes.  We spend a lot of time looking at related works of art and talking about creative ways to use the shapes.  We also look at some animation for ideas and inspiration.


Finally, when students have finished designing their robots, they are invited to write an imaginative story about their robot creation.


If you are interested in doing a similar project with your students, I am sharing my file for the booklet:  click here to download.

Inspiration for Building Creative Robots

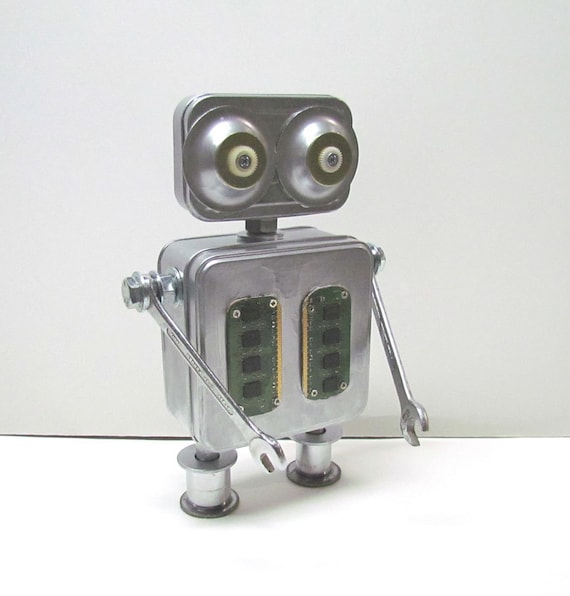
When I present the Geometry Robots lesson to my students, I start off by encouraging them to think creatively about the type of robot they want to create.  What will its character be like?  What is its personality?  And, most importantly, how will you convey that personality?  On that thread, we take some time to look at expressions in works of art and animation, including, but not limited to robots.  Here are just a few of the images I share with my students as I ask them to think about how they will use shapes to create facial expressions and personality in their projects.


Teaching 3D Modeling -- Software options


Student project designed in TinkerCad

Before I get started talking about the different projects I have designed for my Art classes, I wanted to talk a little bit about the programs I use, and go over how to select a program to teach 3D Modeling.  If you've never done 3D modeling before, it can be a little daunting, so I would recommend taking a course or at least playing around with it yourself before jumping in.  I think a lot teachers are hesitant to teach 3D modeling because it might not be something they ever learned, but with a little practice, you can learn enough to get your students started.


Made by the AutoDesk famiy of software, TinkerCad is an awesome place to get started with 3D modeling.  It's web-based and free, so it fits easily within any budget.  It's simple enough to be used by elementary age students, but offers enough variety and advanced features that it won't bore your more technically advanced students.


I'm hoping to put together some video tutorials and/or a downloadable guide book on how to get started teaching TinkerCad.  If this is something you would like to see, please let me know.

For elementary students, I've used the basic geometric shapes that are built into TinkerCad as the basis for the Geometry Robots unit.

Sculptris is the program I've used with my intermediate students.  So far, I've stuck with TinkerCad for elementary and middle grades, and only taught Sculptris to my high school students.  It's a great a program, but a bit buggy at times, so it demands a good deal of patience.  However, it's a great program for being able to sculpt in 3D.


This program was used with good success with my Art History students in the Mini Museum project.

Last, Blender is the program that I used with my advanced 3D Modeling students. It's another open-source program and it's really wonderful.  I start out the semester showing my students a demo reel of professional models and animations made with Blender so that they are aware that they are using a professional-level software.  It's fantastic, but definitely a lot more difficult than TinkerCad.  If you are new to teaching 3D modeling, you probably don't want to start with Blender, but there are a lot of tutorials and courses you can take if you want to learn it.  For students that have the skill set and maturity to learn Blender, it offers them a great deal more control over their final creations.

Some of my students used Blender for the jewelry design project and the Art History Mini Museum with great success. 

Those are just a few of a whole host of programs out there for 3D modeling.  What software do you use to teach 3D modeling?